

How to Install mitmproxy as a System CA on Android Emulator
Learn how to install mitmproxy CA certificate as a System CA on Android Emulator to capture HTTPS traffic without editing app network security configs.
When I was developing the PTE Flow app, I needed to capture HTTPS traffic to check API requests and mock responses. I tried installing the mitmproxy certificate to the Android emulator the normal way as a User CA. The result was a total failure. The app kept showing connection errors and refused to capture any requests.
From Android 7.0 (API 24), Google blocks apps from trusting user-installed certificates on production builds. If you do not want to edit the app's network_security_config.xml file (especially when reverse-engineering third-party apps), the only way is to put the mitmproxy certificate directly into the system partition (System CA).
Here is the fastest way to do it. I will also show you how to fix the annoying read-only system error on new Android versions.
Set up the Android emulator
To write the certificate to the system folder, you must have root access.
Make sure to choose an Android Emulator using a Google APIs image. Do not choose the Google Play Store image because it locks root access over ADB, which makes it impossible to do this.
You also need adb and mitmproxy installed on your computer.
Step 1: Calculate the hash of the mitmproxy CA certificate
First, Android manages system certificates in the /system/etc/security/cacerts/ folder. The file name must be the hash of the certificate with a .0 extension.
When you start mitmproxy for the first time, it generates the CA certificate in the ~/.mitmproxy/ folder. Use openssl to calculate the hash:
cd ~/.mitmproxy
# Get the old subject hash because Android uses this format
hashed_name=$(openssl x509 -inform PEM -subject_hash_old -in mitmproxy-ca-cert.cer | head -1)
# Copy and rename the certificate
cp mitmproxy-ca-cert.cer $hashed_name.0
If successful, this command creates a new file like c8750f0d.0.
Step 2: Start the Android emulator with write permissions
After renaming the certificate file, the next step is to boot the emulator with system write access. The emulator's system partition is read-only by default. To write to it, you must start the emulator from the terminal with a special flag:
emulator -avd <your_emulator_name> -writable-system
(You can see your emulator list by running emulator -list-avds).
Step 3: Fix the remount failed error on the Android emulator (this is usually the frustrating part)
After booting with write permissions, the next step is to remount the system partition. This is where the official mitmproxy docs usually ignore, leaving many developers stuck for hours. On new Android versions (Android 9 and above), when you run adb remount, you will see this error:
remount of /system failed: Read-only file system
To fix this, disable Android Verified Boot (AVB) checks by running these commands:
adb root
adb shell avbctl disable-verification
adb reboot
After the emulator reboots, start the emulator with the -writable-system flag from Step 2 again. Now, running remount will work perfectly:
adb root
adb remount
When you see remount succeeded on your screen, you are 90% done. It feels as good as getting a reply from your crush.
Step 4: Copy the mitmproxy certificate to the system partition
When the system partition is writable, now push the certificate file you renamed in Step 1 to the Android system certificate folder:
# Push the certificate file to Android cacerts folder
adb push ~/.mitmproxy/c8750f0d.0 /system/etc/security/cacerts/
# Set correct read-write permissions (644) for the system certificate
adb shell chmod 644 /system/etc/security/cacerts/c8750f0d.0
Remember to replace c8750f0d.0 with the actual hash you calculated in Step 1.
Finally, reboot the device to apply the changes:
adb reboot
How to verify the mitmproxy certificate on the device
Finally, after the emulator reboots, go to the settings menu to verify: Settings -> Security -> Encryption & credentials -> Trusted credentials.
Choose the System tab and scroll down to find mitmproxy.
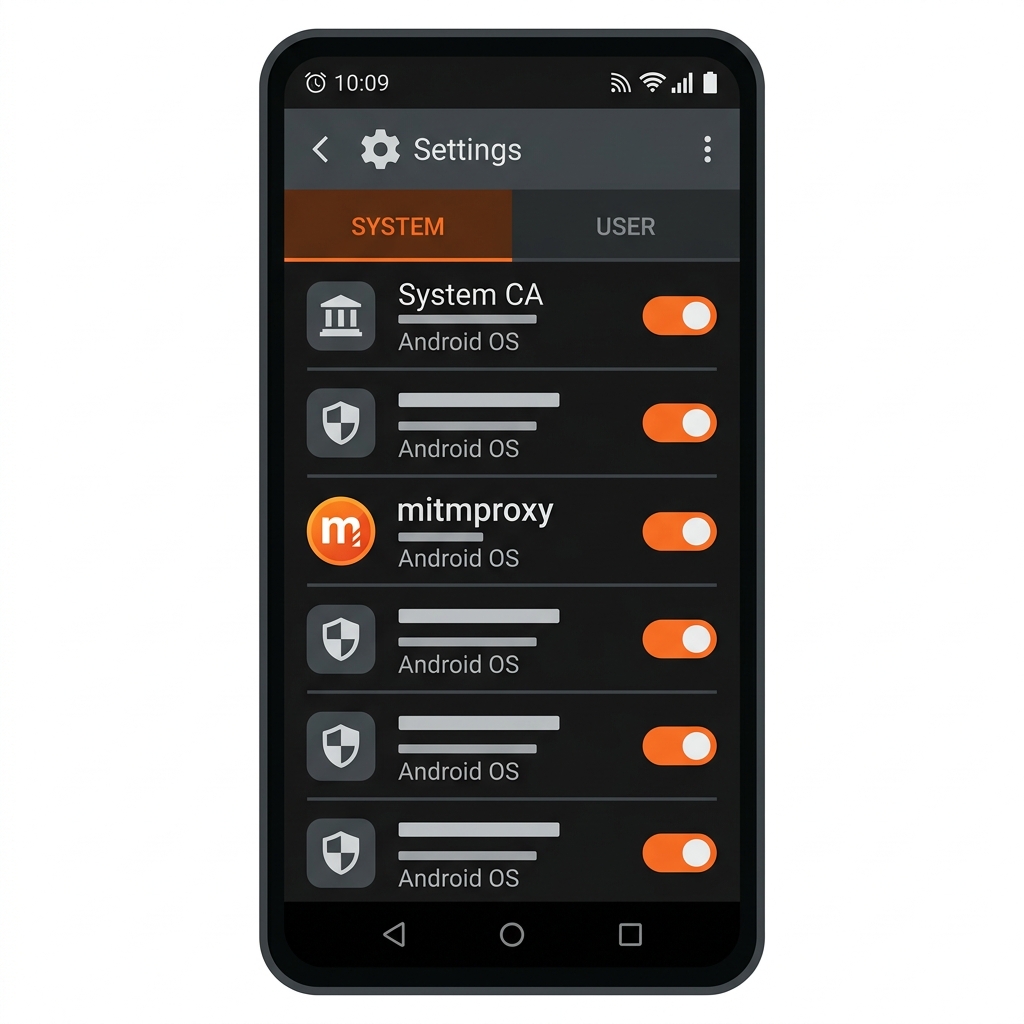
If you see it there, you succeeded. Now configure the proxy settings on your emulator to point to your computer's IP address and start capturing HTTPS traffic.
Security trade-offs and alternatives
Disabling AVB verification (avbctl disable-verification) and running -writable-system breaks the Android security sandbox. Malicious root processes can write to your system partition. Only do this on development emulators. Never do this on a physical phone with personal data.
If you must debug on a physical phone, a safer alternative is to root your phone with Magisk and install the MagiskTrustUserCerts module. This module moves user certificates to the system folder on boot without touching the system partition directly. To install it, download the zip file from the GitHub repository (github.com/Notsure2/MagiskTrustUserCerts), copy it to your phone, and flash it through the Magisk Manager app.
If you want to read more about mobile development or UI bugs on Android, check out my old post on how to fix clipped text in Android TextView with custom fonts. Leave a comment below if you have questions or want to share other Magisk modules for bypassing SSL pinning.